Hi friend! I’m here to share my mom’s homemade bread recipe with you. It’s easy, simple and delicious. This is the only recipe I have EVER used to make bread because it’s come out perfect for me every single time. On top of that, it makes 4 loaves of bread. One for now, 3 to freeze. This means I only have to bake bread once a month. Work smarter, not harder!
This post contains affiliate links. This means that if you purchase one of the items in this article I will make a very small commission, at no extra cost to you. For more information, see my disclosure policy.
As a child, I grew up watching my mom make this homemade bread on a regular basis. I remember countless times I would tumble in the door from playing outside, greeted by the smell of fresh bread filling the air. Bread day was my favorite day–sometimes we’d make cinnamon rolls or pizza too!
I have to confess, I love bread. I could live on grilled cheese alone (which was proven during my college years). I’ve only recently started baking my own bread, which is SO much easier than I thought it would be. I get such a wave of satisfaction every time I pull a perfectly rounded bread loaf out of the oven.

Why make bread homemade?
There are a few staples in my kitchen that I always make from scratch. All of them are relatively simple and don’t take any crazy kitchen know-how. You can check out my full list of what I make from scratch right here. I like knowing exactly what’s in my food and how it was made. It’s healthier, less processed, and there’s less waste involved. Plus, it always tastes better.
I originally started baking my homemade bread during my One Week Plastic-Free Challenge, but I haven’t stopped. It helps me to reduce plastic coming into our kitchen (Yay, save the planet!) and I use organic flour to keep it healthy!
Zero waste bread storage
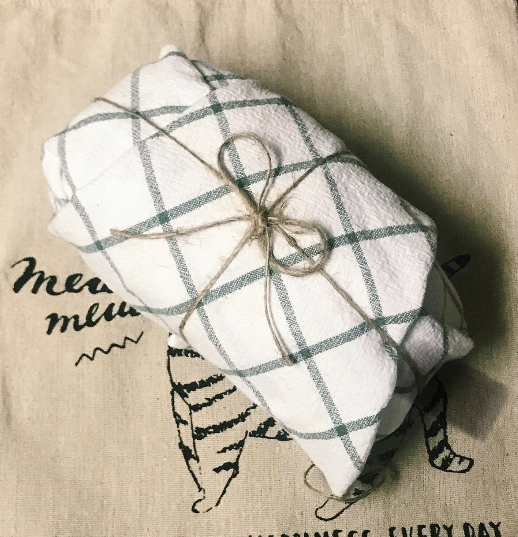
To avoid using plastic for storage, I freeze the bread wrapped in two large tea towels. Wrap that loaf like it’s a burrito, then tie it with string or a rubber band!
Once I take it out of the freezer, I store it in a reusable beeswax wrap that I made. If you haven’t used beeswax wraps before, you are missing out on the BEST reusable food storage option! Beeswax wraps are perfect for storing bread: wrap it around your loaf of bread, use the heat from your hands to mold it around the loaf, and then put it in the refrigerator. The cold air will keep the beeswax wrap tight against the bread, keeping it nice and fresh!
You can DIY your own wraps if you’re feeling crafty or you can buy them here from EarthHero, my favorite online store.
Without further delay, let’s make some homemade bread!
Combine your dry ingredients in a large bowl and whisk them together. You’ll be adding several cups of water to the bowl, so make sure it’s big enough for you to stir and knead the dough in. You want to have room to work.
Add in your warm water. You’ll want it to be very warm, not lukewarm, but also not hot. Using a large wooden spoon, mix it all up until a ball of dough begins to form.
The dough will likely still be a bit wet, so continue to add a handful of flour at a time until your dough is no longer sticky. I usually have switched to mixing the dough with my hands by now.
Once you get the dough to the right consistency (it should not stick to your hands, instead it should be elastic), start kneading it. I find it easiest to put my bowl on the kitchen floor so I can put my weight into it.

After kneading your bread dough for 12 minutes, separate it into 4 loaves. Form the dough to fit into your well-oiled bread pans and put them in the oven to rise.
I always use the oven as a safe space so the dough can rise, so that I don’t accidentally bump into them and make them fall. After about 20-25 minutes, your flat blobs of dough will have transformed into bread-shaped loaves. Ta-da! The magic of yeast!

Very, very carefully remove your bread loaves, set them on the counter and preheat your oven to 350°.
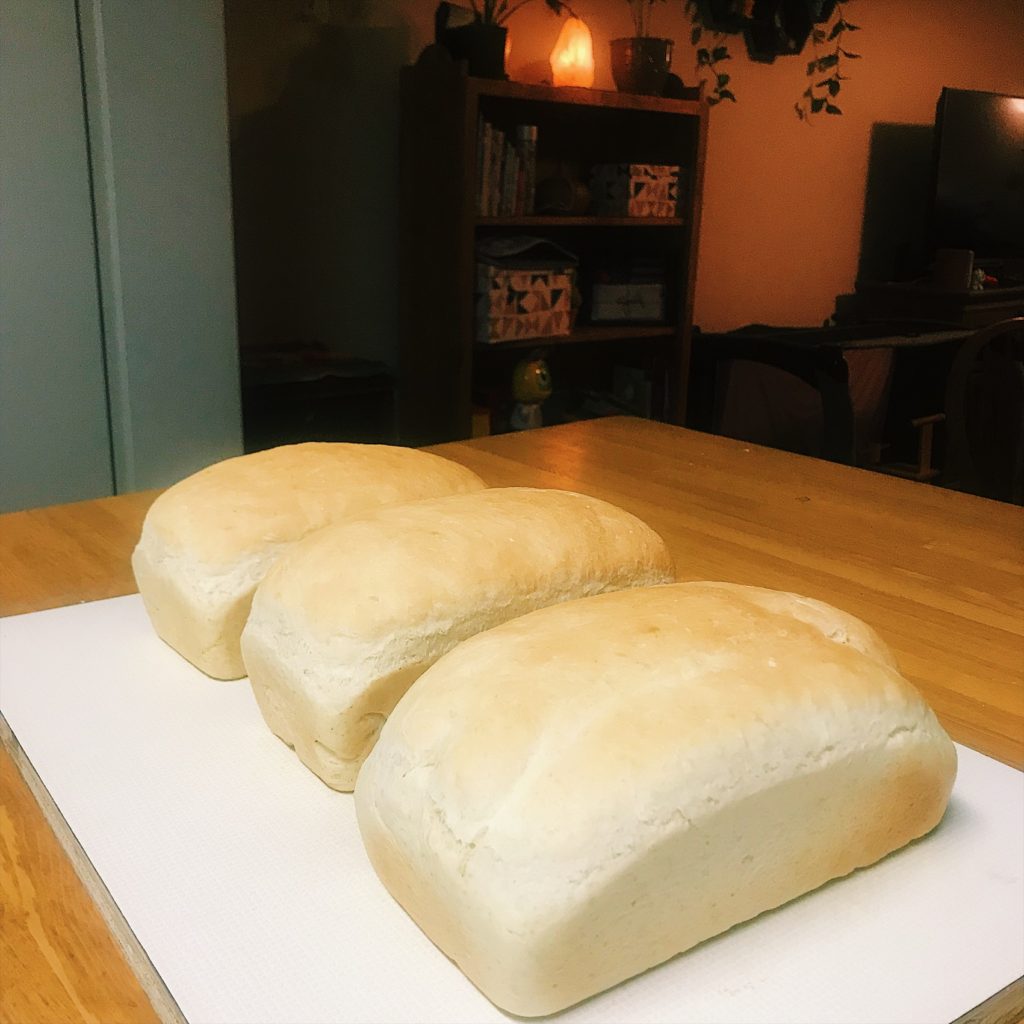
You’re all set! Once your oven is preheated, gently slide the loaves back in, set your timer for 22 minutes, and wait for your bread to bake. My bread usually takes between 22-25 minutes.
You’ll know it’s done when the tops are golden brown. I highly recommend using these nonstick bread pans to ensure the bread pops out easily without sticking to the sides of the pan.
This homemade bread recipe is one of my favorite recipes of all time! I love being able to make bread from scratch–it just gives me such a sense of accomplishment. Whether you’re a beginner bread maker like me or a seasoned expert, this recipe is the perfect bread recipe for you!

Mom’s Easy Homemade Bread
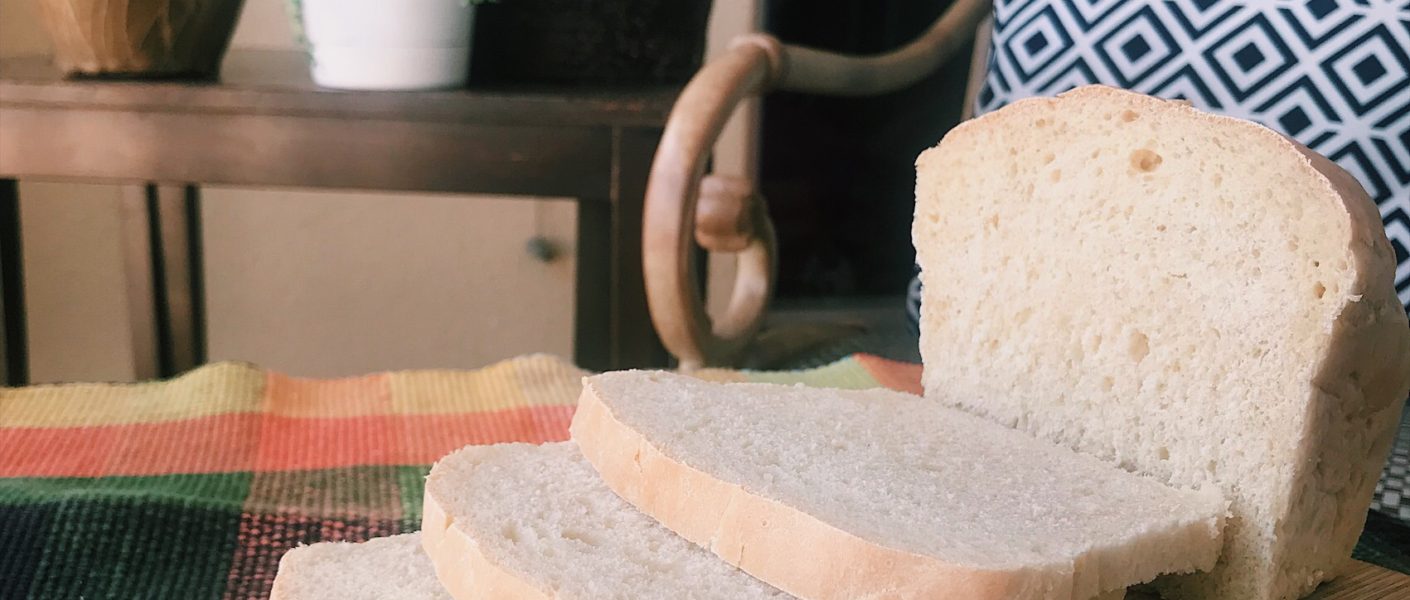
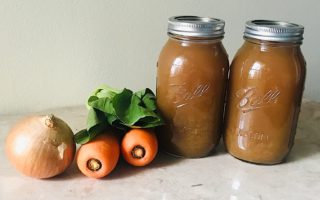
This simple 5-ingredient recipe for homemade bread comes together in no time! Enjoy thick slices of bread with butter, dip it in soup, or use it for grilled cheese sandwiches.
Ingredients
- 8 c. all-purpose flour
- 2.5 tbsp instant yeast*
- 1 tbsp. salt
- 4 tbsp. sugar
- 5 c. warm water
Instructions
-
Put dry ingredients in bowl and whisk together.
-
Add warm water. Stir.
-
Knead for 12 minutes, adding a handful of flour at a time until it is no longer sticky. The dough should be elastic and not stick to your hands.
-
Form into four equal sized loaves and place in well-oiled bread pans.
-
Let rise in unheated oven for 20 minutes, then very carefully & gently take it out.
-
Preheat the oven to 350° and then bake for 22-25 minutes. The tops should be golden brown.
-
Cool in bread pans for five minutes before popping the loaves out to cool on rack.
Recipe Notes
*I use Fleischmann’s RapidRise Instant Yeast
*For whole wheat flour substitution, use 6 c. whole wheat flour instead of all-purpose flour.
*You can substitute 4. Tbsp of honey for the sugar if you avoid processed sugar. Dissolve it into some of the warm water before adding it in. You will need to bake your bread a bit longer since the honey makes the bread more moist.


Easy to make and delicious. As I put in the water I poured in til it was the right consistency to knead
Thanks for sharing, Colleen! That’s a great way to do it 😊 Glad you enjoyed the recipe!
Did I mention I love this recipe? We’ll be visiting my father-in-law tomorrow, so I whipped up a few loaves of bread tonight to take to him. So easy. I mix itin my Kitchen Aid and away we go. Love this.
Thank you Jeannette!!! I’m so glad you love it! Also it’s good to know that it works well in the Kitchen Aid!
How can I cut this recipe into just 2 loaves ? I’ve never baked homemade bread before. Also, how long will the bread keep fresh?
Hi Alisha! I’ve never halved the recipe before, but I don’t see why it wouldn’t work! I’ve never halved the recipe before, but I don’t see why it wouldn’t work! I would do 4 c. flour, 1 and 1/4 tbsp yeast, 1/2 tbsp salt, 2 tbsp. sugar, and start with 1.5 c. warm water. You can always add more flour or water to reach the right consistency to knead (the dough should be elastic while you’re kneading and not stick to your hands). I would keep one loaf in the refrigerator and freeze the second one for ultimate freshness–if I keep a loaf in the fridge it stays fresh for at least 1.5 weeks. I’ve never managed to keep a loaf uneaten longer than that. Hopefully that helps! Let me know how it works for you! 🙂
Alisha, I half it all the time with no problem with the measurements above.
I have quick rise yeast is there a difference
Hi Beth! Rapid rise yeast is the same as instant yeast, so you don’t need to make any changes to the recipe!
Can you make this recipe in mini loafs?
I haven’t tried in mini loaves, but I’m sure you can! Just keep in mind that since it makes four regular loaves, it’ll make a whole lot of mini loaves! Also, I would reduce the temperature to 325 and check them frequently with a toothpick to make sure they don’t get over done. Hope that’s helpful!
I am going to try this for sure because with the current situation we all live in now there is no bread in the stores. This looks even better than store bought anyways and yes I am a bread lover too which is why I have to try this to get through all this craziness in the world. Thank you so much for sharing this!
I hear you! This is definitely the perfect time to hone our baking skills so we’re less dependent on what’s on the store shelves. With all the social distancing, we all have a little more time on our hands to try new things! I hope things start looking up soon where you’re at. And I hope you enjoy the bread!!
Would it be ok to use my kitchen aid and dough hook for the kneading?
I’ve personally never used a kitchenaid for kneading dough before, so I’m not sure how it will turn out. The Kitchenaid website says you can do speed 2 for 2 minutes for kneading bread dough! I would either halve the recipe or mix the dough first, and then put only half in the mixer at a time.
Yes, I use mine every time and it works perfectly.
Jeannette, I’m curious to know your method. I just tried halving the recipe for 2 loaves and it just would NOT knead into a ball! I’m not a baking expert at ALL sooo I’m not entirely sure it was the kitchen aids fault 😆
Jenelle, I just saw this. Sorry. I just follow the steps, nothing special. I am going to try to is recipe as dinner rolls tomorrow. I’ll let you know how it works.
Just curious, if I only have one loaf pan, can I bake one at a time? Do I let it sit out or will it ruin in between uses?
The dough needs to go in the oven as soon as it’s done rising, otherwise it’ll fall. I would recommend halving the recipe and baking one loaf of bread, and using the other half for little biscuits or pizza dough. For the biscuits, you can use a muffin tin and roll 3 small balls (the size of gumballs) and place the three together in a muffin cup. I’ve made a whole tray of these before and they’re always a hit in our house! Then you can let them rise at the same time of your other loaf of bread and bake them together!
Could you please tell me what size your bread pans are? Thank you❣️
I have one that’s 9×5 and three that are 8×4! I just make the 9×5 loaf a bigger portion of the dough and it works out perfectly!
Looks delicious! Can I use bread flour instead of all purpose?
I’ve never used bread flour before, but I’m sure you can! For the very best loaf, I’d recommend all purpose flour since that’s what the recipe calls for/what I’m familiar with using, but if you have bread flour on hand, go for it!
Yum! One note is that 3 tablespoons of yeast is much more than 3 packets of yeast. Three tablespoons is 9 teaspoons. Three packets is only 6.75 teaspoons. It can make a difference.
Thanks for catching that Rachel! I made the switch from packets to using yeast from the jar and must have miscalculated. I’ll update the amounts now!
I’m very excited to try this recipe but was wondering if I could use my kitchen aid mixer due to arthritis. If so, what would the directions be regarding kneading time and speed of mixer.
Hi Tanya! I’ve never tried using a kitchen aid mixer to knead the dough so I can’t speak from experience. I would definitely either halve the recipe or mix the dough before kneading and only do half in the mixer at a time. Per the Kitchenaid website, you can try doing speed 2 for 2 minutes and that may work.
Hi, do you have to adjust anything if you use “active dry yeast” instead of the “rapid rise” ? thank you
Hi Melissa! You need to use 25% more yeast, and dissolve it in the warm water first. So for every one tablespoon instant/rapid rise yeast, use 1.25 tablespoon active dry yeast.
Do you have to dissolve the yeast into the warm water first?
No you don’t! Just whisk the dry ingredients together and you’re good to go.
I should add, make sure it’s instant yeast and not active dry! Active dry has to be dissolved in water first.
Hi , can you make 4 loaves and only rise one and freeze other three formed loaves in freezer and take out and room temp 4-5 hrs and let them rise as needed
I’ve never tried this but I’m curious now! Let me know if you end up trying it and how it goes for you 🙂
Can this be prepped in the bread maker?
I’m not sure. Since it’s a recipe for four loaves, I wouldn’t recommend it.
Can I use active dry yeast if that is all I have on hand? How?
Hi Debbie! You sure can! You’ll just need to use 25% more yeast, and dissolve it in the warm water first. So for every one tablespoon instant/rapid rise yeast, use 1.25 tablespoon active dry yeast.
Is tbsp tablespoon or teaspoon! I’m confused!
Tbsp is tablespoon! 🙌🏻
This recipe was so easy and delicious! I used bread flour because I had it on hand. I also only had dry active yeast, so I added 3 Tbsp to the warm water to dissolve before adding them to the dry ingredients. First time bread maker, and now I’ll use this recipe again and again! Thanks for sharing!
I’m so happy to hear that you enjoyed the recipe! Congratulations on your first successful bread baking experience!!!
Hi I wanted to try this recipe out first with a smaller batch. any suggestion on how to half or 1/4 this recipe?
Hi Kristin! I’ve never halved the recipe before, but I don’t see why it wouldn’t work! I would do 4 c. flour, 1 and 1/4 tbsp yeast, 1/2 tbsp salt, 2 tbsp. sugar, and start with 1.5 c. warm water. You can always add more flour or water to reach the right consistency to knead (the dough should be elastic while you’re kneading and not stick to your hands).
Yay!!!! They turned out❣️ I’m so excited as I’m not a seasoned bread maker. Followed your recipe as directed and they are wonderful & easy to make. Thank you, thank you, thank you😊
Hooray!!!! I am so happy to hear that!
First time making home made bread just finished prep now waiting to rise then cook before I go to bed 🙂 cant wait to eat fresh bread with breakfast in the morning
Yay! I’m so excited for you! Fresh bread is the best!! 🙌🏻
My dough doesn’t rise, is it the yeast?
Hi Titibha! It could be the yeast if you’re using old yeast. Also, the temperature of the water added is important–too hot and it’ll kill the yeast. Too cold and it won’t activate the yeast. It should be warmer than lukewarm, but definitely not actual hot water.
Hi! I’m just wondering if you meant tsp and not tbsp…that seems like SO much yeast. Is it 3 packets of yeast? I saw the comment above and you said you’d change the amounts but I’m still seeing tablespoons…sorry I’m just confused and not wanting to use more than yeast than necessary since the grocery stores are out of yeast right now. Thanks!!!
Nope, the amounts have been updated! I used to make it with only 3 packets and it would turn out okay, so if you want to conserve yeast, you can do it that way. They won’t rise quite as much though!
Just my luck man me didn’t rise?? Do you think I added to much flour while getting dough to right consistency?? I’m still waiting but has been 25 minutes? What are your thoughts I’m so bummed!!!
Oh no! That stinks!! You kneaded it, right? Too much flour won’t cause it not to rise (I’ve add a whole lot of flour when I make it). I’d say your water was either not warm enough to activate the yeast, or too hot and it killed the yeast. Do you think it could have been either of those? 🙁
For active dry yeast do I dissolve it in the 5 cups of water then add the water once it is dissolved? My packets of dry yeast contain 2 1/4 teaspoons. How many packets do I need for this exact recipe or dry active yeast?
Definitely dissolve it in the warm water first! Another reader said she used 3 tbsp of active dry yeast for this recipe and it turned out great. I haven’t personally used it before.
I love this recipe and I am baking some now. This is my second attempt. The first time it didn’t rise very high but was still delicious and also it took quite alot longer than 25 minutes to bake. I had to add another 20 minutes or so and its looking the same this time. But…still love the taste!
I’m glad you’re enjoying it! Maybe you can knead harder/up the kneading time and it will rise higher and cook quicker!
So..you don’t do a double rise with this recipe? I normally let my dough rise in bowl after kneading, them punch it down. Then I put it in the pans to let the loaves rise again.
I’ve never done a double rise before. Give it a shot though if you’ve done it before!! Maybe it’ll turn out fluffier 🙂
Hi jennifer
So happy to see your recipe which does not include milk or buttet, i am will be baking first time on bread, but i have a small oven, wondering if i can use only 2 cups flour but i dont know how to cut back on other ingredients, appreciate if you can help me on this.
Thanks
Nena
Hi Nena! You can half this recipe no problem, not sure about getting it down to only two cups of flour though!
I halved this recipe according to what you said in previous comments. My dough did not form a ball AT ALL. I probably used the full 8 cups of flour in a half recipe and it remained super sticky throughout the whole process. Pretty disappointed.
Yikes, I’m sorry to hear that! I’ve never halved the recipe before but have had other readers who have successfully. I’ll update the amounts to have less water though. What a bummer!
Jennifer, I am baking my first loaf now. Sat to read through all the q&a again and what I noticed is your consistently kind and encouraging character. What a gem!
Aww thank you so much! Your comment made my whole day!! I hope your bread turned out great 🙂
I went over this internet site and I believe you have a lot of fantastic information, saved to favorites (:.
Thanks so much!
What does the c stand for in the measures please? I’m in the uk so used to grams or ounces – not sure what the c could stand for? Thanks 🙂
Hi Jo! C stands for cups. Hope that helps!
I halved the recipe just to try and reduce my disappointment if it turned into a disaster….I baked my first 2 successful loaves🤸🏿♀️ this will definitely become a staple in my family…. Thanks
I just found your recipe and made a half batch right away. It smells so good. I will get a loaf sliced and ready for tomorrow morning soon. Thank you for the recipe!